Build a Budget Off-Road Rig: Prioritize Maximum Impact Mods
Build a Budget Off-Road Rig: Prioritize Maximum Impact Mods

Building an off-road rig doesn’t have to drain your savings or weigh down your ride with parts you’ll never use. The goal isn’t to check off every mod on the market. It’s to invest in parts that make a real difference from the driver’s seat.
Instead of falling into the trap of flashy upgrades or “just because” installs, think strategically. A well-built budget rig doesn’t cut corners; it skips the fluff. Whether you’re hitting sandy trails near St. Augustine, Florida, or navigating muddy easements after a storm, prioritize maximum impact mods to build a budget off-road rig.
Start With Wheels and Tires
Before you lift the vehicle, tune it, or weigh it down with gear, lock in your wheels and tires. They’re the foundation of everything your ride can (and can’t) do. To acclimate to Florida’s terrain, look for all-terrain or mud-terrain tires with reinforced sidewalls, prominent tread blocks, and deep grooves. The tires can handle sand, wet grass, and hardpack.
Don’t just size up the tires and wheels on a whim. If you’re planning a suspension lift, select tires that will still fit comfortably post-lift. Jumping from 33-inch to 35-inch tires later means replacing both the tires and wheels again, blowing your budget in the process. It’s smarter to size your current setup for where your build will be six months from now.
Add Recovery Points Early
Even experienced drivers get stuck in the mud sometimes. When they do, recovery points can get you out of a bad situation in five minutes. Install front and rear tow hooks or D-rings immediately after your tires go on. If the factory bumper doesn’t offer secure mounts, upgrade to a steel bumper with integrated recovery points.
Recovery gear might not be the flashiest mod, but it’s one of the most functional add-ons. You’ll appreciate the hooks the first time the tires dig into loose sugar sand or you lose traction in a flooded forest trail.
Install the recovery gear before any trail runs, ideally within the first month of your build. This element will give you more peace of mind than you think.

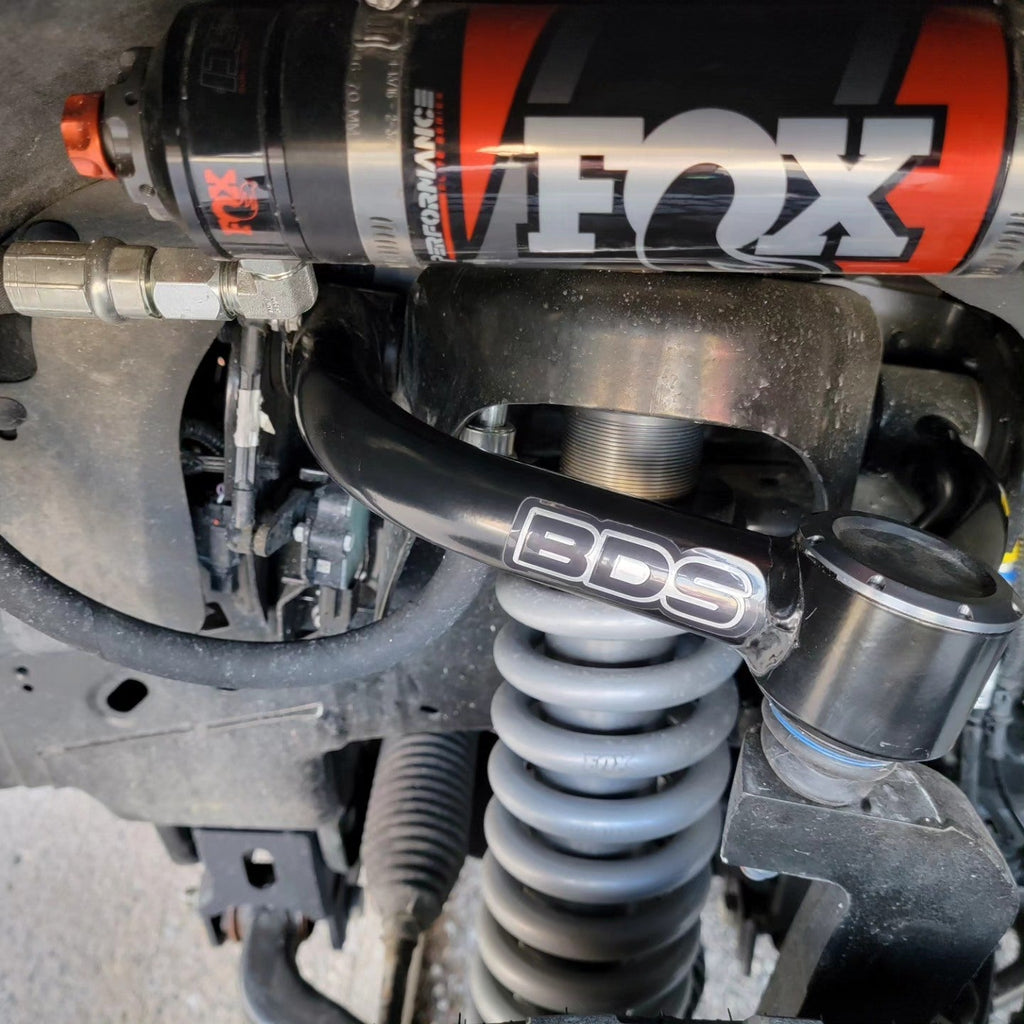
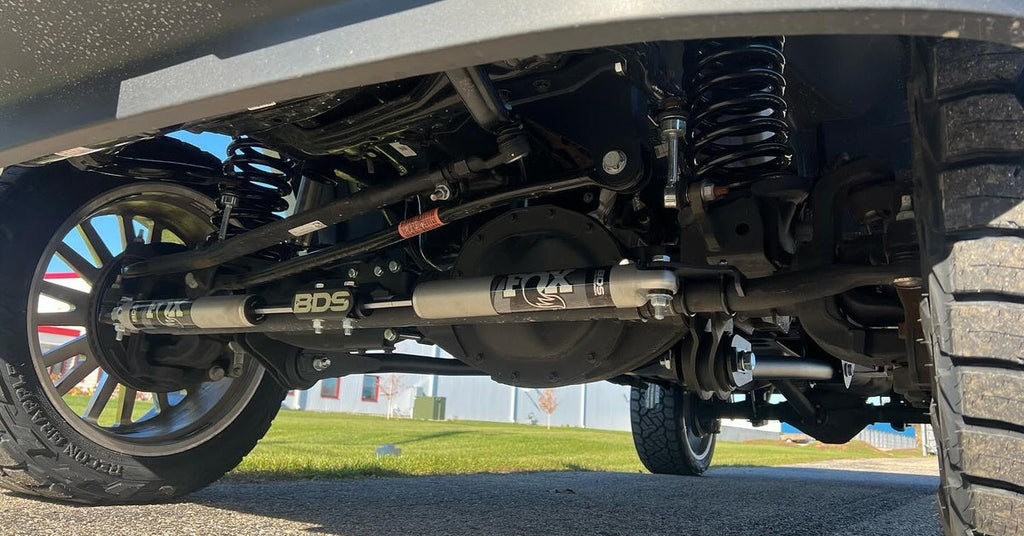
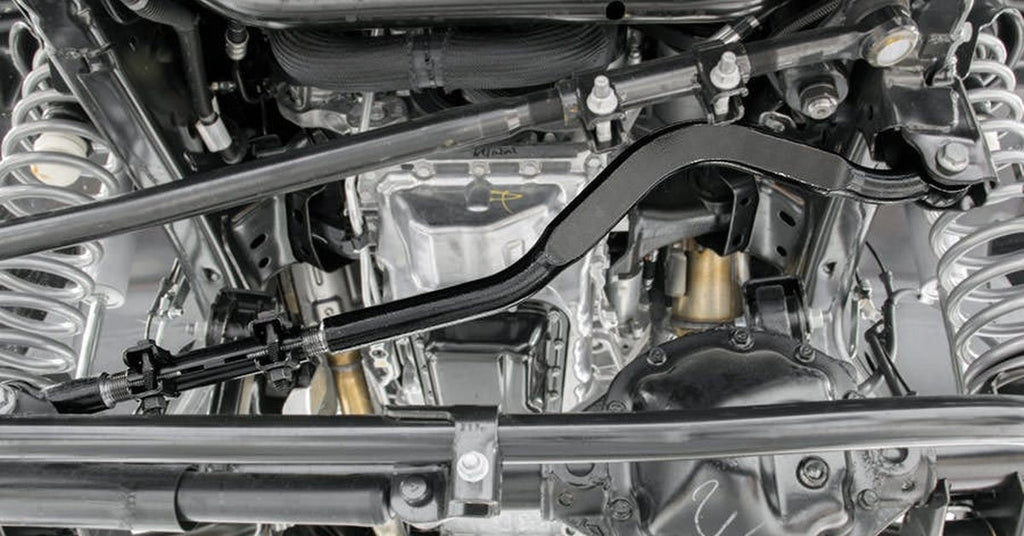
Suspension Upgrades That Do More
With traction and recovery dialed in, it’s time to address the suspension. Rather than maxing out lift height, opt for a mid-travel suspension system; something with quality shocks, progressive-rate springs, and the ability to carry load without sagging is exactly what you need. Mid-travel systems are usually easier to install and more budget-friendly than long-travel setups, making them ideal for first-phase builds.
Stick to systems that improve travel and ride quality, not just the vehicle’s appearance. Trails don’t need boulder-crawling flex, but you’ll want better articulation and dampening on washed-out trails and sudden drop-offs.
Think about future use, too. Will you add a rooftop tent, tools, or weekend camping gear? The suspension should be able to handle it all.
Protect the Undercarriage
Once your rig is ready to hit the trails, it’s time to think about maintenance. Start with installing skid plates for the oil pan, transfer case, and fuel tank. These are the first pieces to take a hit when there’s no more clearance. Rock sliders help prevent body damage, especially in tight, wooded areas where stumps or roots creep into the trail.
Aluminum skid plates are also a smart bet. They’re lightweight, corrosion-resistant, and more than tough enough for impacts from logs, shells, or submerged roots. Consider adding rear diff covers at the same time. They’re easy to install in under an hour.
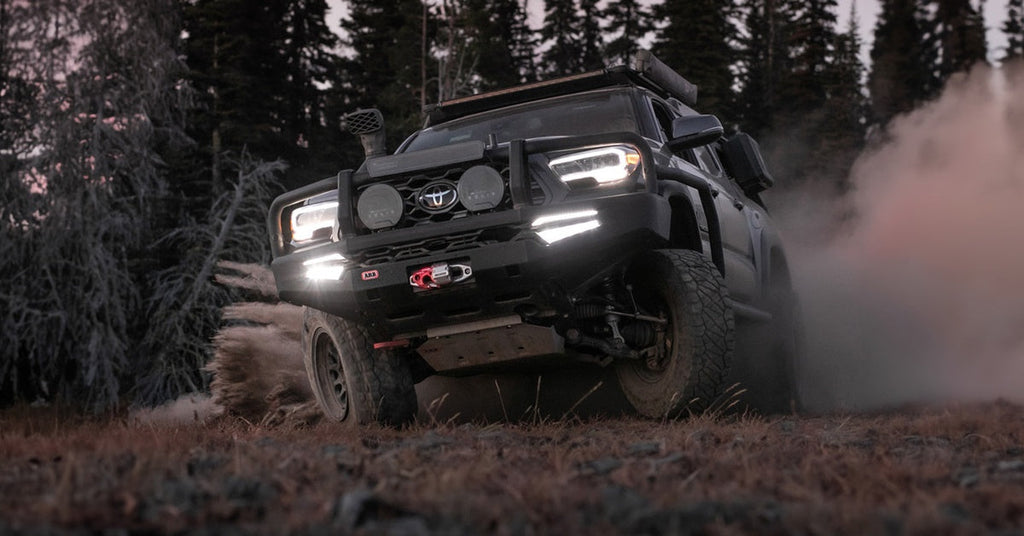
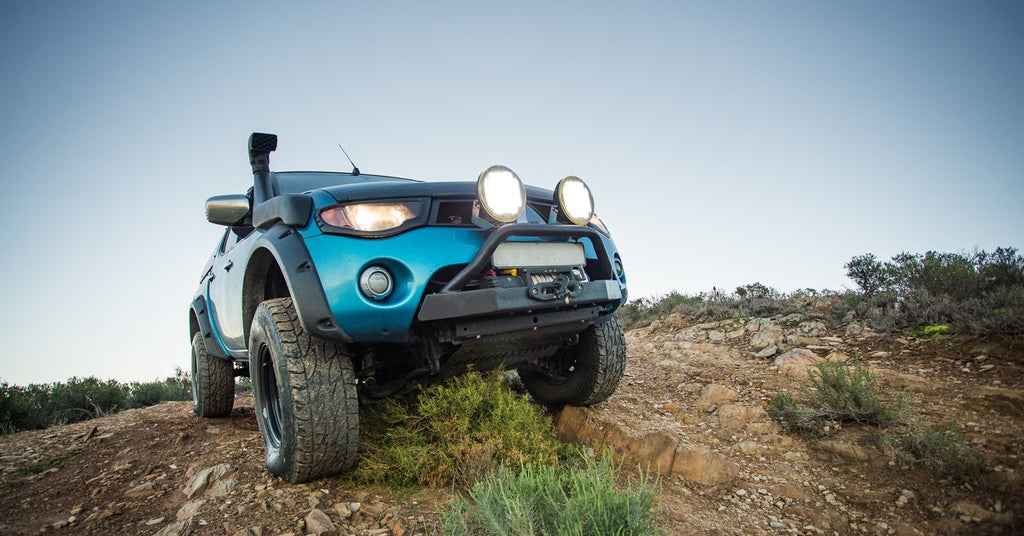
Boost Visibility With Lighting
Auxiliary lighting is the most underestimated upgrade, until you’re stuck navigating a forest road at 9:00 p.m. or reversing on a foggy shoreline before sunrise. Whether you’re trail running, hunting, or just camping in the woods, visibility keeps your rig—and everyone around it—safer.
Begin with a modular approach. Mounting a low-profile light bar above the windshield gives you forward projection without compromising aerodynamics. Surface-mounted cube lights on the bumper or A-pillars add side and ditch visibility. The beauty of modular lighting setups is adaptability. As your build evolves, you can remount or repurpose the lights without buying new gear every time.
Don’t Skip Air Management
Airing down isn’t just for sand; it’s one of the simplest ways to improve ride quality and traction. Florida terrain calls for it constantly. Before you hit the beaches around St. Augustine, drop to 15 PSI (pounds per square inch) to glide over sugar sand instead of sinking. But deflated tires won’t help you on the highway ride home, so you need a reliable way to air back up.
That’s where onboard air comes in. A dual compressor system can fill tires in under 6 minutes, which beats waiting in line at a crowded gas station. If you’re not ready for a permanent setup, go with a portable compressor that stows neatly in your storage system. Either way, proper air management gives you control, wherever the trail (or the tide) takes you.

Storage That Serves the Build
Gear piles up fast. Without a system in place, it turns into a rattletrap mess that you dig through every trip. Modular storage keeps you organized and helps future-proof your build. Drawer systems and MOLLE (modular lightweight load-carrying equipment) panels allow you to secure tools, recovery gear, and essentials exactly where you want them. With these, there’s no guesswork or shifting loads.
Think about how storage ties into the bigger plans. Rooftop storage boxes can double as platforms for tents. Water tanks can bolt onto existing racks. By investing in functional storage from the start, you avoid redundant purchases and wasted space.
Finish With Tuned Accessories
Once the big systems are ready to go, it’s time for fine-tuning. Consider control arms that improve articulation post-lift, or switch panels that make operating lights and air systems a breeze. Accessories like a quality winch—rated for 1.5 times the rig’s loaded weight—are worth adding at this stage because the electrical and structural systems can handle them.
Keep a tight filter here: does this accessory improve function, safety, or user experience? If it doesn’t, skip it. This phase should refine your rig, not clutter it. The goal isn’t to impress in a parking lot; it’s to perform when you’re 20 miles from pavement with no cell signal and an unexpected obstacle in your path.
Build With the End in Mind
Every seasoned off-roader knows the best builds are thoughtful. A sharp rig isn’t built in a weekend; it’s built in phases, based on real trail experience and functional needs. Before you install anything, ask yourself: Will this mod serve my long-term goals? Will it hold up over time?
Prioritize maximum impact mods to build a budget off-road rig that’s built to last. Shop performance-grade suspension and accessories through Twisted Pro All-Terrain. If you’re local to St. Augustine, Florida, Twisted Pro can also help you plan your next mod in person.